

An action packed linear level, designed using Unreal Engine 4, and built to a playable state in Far Cry 5 editor.
Project: Ice Blast
Project Introduction
This was a personal project for my portfolio in which I challenged myself to:
-
Create a linear action level that plays like a ‘full mission’ within the Far Cry 5 world.
-
Push my skills to create a level that feels like a professionally crafted cinematic action experience.
I chose to use the Far Cry 5 editor as it comes preloaded with enemy npcs, AAA combat and traversal mechanics, plenty of environment assets, and a simple scripting system; this meant I could focus on level design.
Project Details
Level Name: Ice Blast (working title)
Engine: Far Cry 5 Editor
Themes: Alpine, Ruins, Industrial, Military
Genre: Action, FPS, Adventure
Project Duration: 5 months
Play Durations:
-
Entire level 45-60 mins
-
Individual areas 5-10 mins
Project Features
-
It’s a complete mission i.e. start, middle, end.
-
Showcases core level design skills.
-
Unique World Event: A fire breaks out which spreads through the environment as the player progresses presenting an ever growing threat.
-
Exciting combat encounters using a variety of; wave types, environment setups, flanking, surprises, vehicles, and stealth opportunities.
-
Balanced challenges and pacing.
-
Player guidance using; landmarking, breadcrumbing, sightlines, and other visual signaling.
-
Balanced supplies in order to amplify rewards.
-
A linear level which doesn’t feel linear through the use of interweaving critical paths.
-
Playtester sessions and utilising feedback to improve the experience.
Presentation
Contents
1.
-
Level Summary
-
Select a Level Area to see the playthrough video, design, and development work.
-
Final Pacing Chart
2.
A brief overview of my whole process and snapshots of how the level developed between major milestones.
3.
Project reflections and learning outcomes.
Presentation Breakdown
This is a big level, as such the presentation is broken down into smaller sections covering individual level areas as standalone pieces of work.
You can chose between the level areas in the Level Overview section below.
Final Level Overview
Level Summary
Level Map + Area Select
Pacing Chart
Narrative Backdrop
Set within the Far Cry 5 world you play as a soldier who’s team has been wiped out by a retreating enemy force, during the surprise encounter you spot two high profile enemy leaders, ‘The Twins’.
You track the enemies back to an abandoned Communication Facility high in the mountains. The Twins are cornered and scurrying to be evacuated, the opportunity cannot be lost, you must eliminate them at all cost.

Level Playthrough Summary
-
The level begins with the player arriving just outside the perimeter of the derelict Communication Facility where 'The Twins' have taken refuge.
-
The player sneaks into the facility and accidentally causes a fire to break out which reveals their presence to enemy forces.
-
They fight their way through waves of enemies and overcome various obstacles as they close in on ‘The Twins’ hiding location.
-
‘The Twins’ are eliminated during a fierce battle atop an inflames ruins featuring a surprise enemy attack helicopter sent to evacuate 'The Twins'.
-
The player bulldozes their way through a convoy of remnant enemy forces using the powerful weapons they’ve acquired before escaping into the wilderness.
Level Areas Guide

Level Area Select
Chose an area below to see final playthrough footage, and learn a bit about the design and development behind it.
Presentation Status
Green = Complete
Orange = All there, except Development Section incomplete.

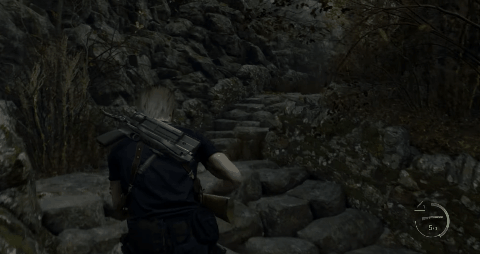
1. Mountain Trail
You're given orders to take out the cornered enemy leaders called The Twins. Begin your journey towards the distant ruins.
Play Duration: 5:45


2. Frozen Pool
3. Generator Area
Discover a hidden entrance into the ruins by swimming under the ice.
Searching for a key results in a fire breaking out, enemies arrive to investigate.
Play Duration: 2:22
Play Duration: 5:25

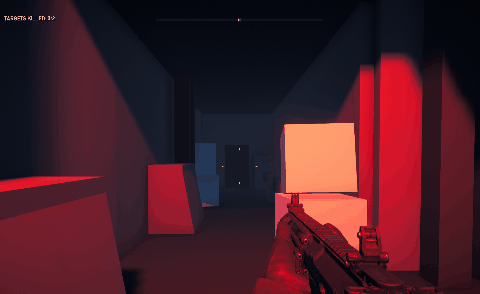
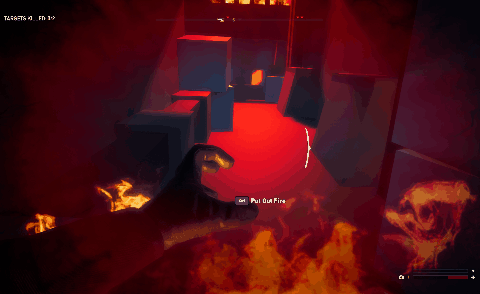
4. Utility Tunnels
Encounter a Flamethrower equipped enemy in claustrophobic tunnels.
Play Duration: 2:11

5. Fuel Store
Blast a wall open without blowing yourself up too.

6. Fire Fight Tower
Ascend a building fighting through enemies while a fiery inferno climbs close behind.
Play Duration: 1:33
Play Duration: 6:39

7. Ruin Ascent
Zipline across a chasm and suddenly you're pinned down by gunfire, fight your way towards the ruins and once inside find a way up.

8. Ruins Rooftop
The Twins are cornered and the final showdown begins.

9. Escape Route
The exit is in sight, you're close but heavy enemy reinforcements arrive, blow them to bits with a newly acquired weapon.
Play Duration: 5:20
Play Duration: 7:40
Play Duration: 6:18
Pacing Chart
This represents the level's final state. I'd seen similar charts in level design articles and books so thought it would be interesting to create one for this project.
This PDF is super wide, use the scroll bar at the bottom of the viewer or middle click to see the rest.
Level Area 1
MOUNTAIN TRAIL
Level Start, head towards the ruins.
Area Summary
The player starts at the outskirts of the Communications Facility where 'The Twins' have taken refuge with their remaining forces and await evacuation.
Under the cover of darkness the player makes their way towards the facility through a winding labyrinth of mountainous terrain. Along the way they encounter enemy guards on patrol, rocky traversal challenges, and must search for an alternative route when their intended path is blocked.
Final Playthrough Video
This video begins at the Level Start and finishes just before 'Frozen Pool' Area 2.
Level Design Key Points
-
Stealth encounter opportunities against enemies, option to evade or engage.
-
Low enemy presence to ease the player into combat, and keep their guard up.
-
Use of pinch points, sightlines, breadcrumbing, and leading lines to guide the player.
-
Platforming and exploration to fit the ‘off beaten track’ and ‘journeying’ themes.
-
Repeatedly reveal views of the facility ruins as the player gets closer to create a sense of progress and maintain curiosity.
-
Facility Radome (big sphere) structure forms a major landmark to help orientate the player.
-
‘Bait & Switch’ setup, apparent way forward is blocked, must search for a hidden alternative route.
Development
Mountain Trail
Design Intent
The goal at the level start was to immediately grab the player’s interest by showing them the scale of the level and distant facility ruins, quickly ramping up curiosity and anticipation for what may lay ahead. I achieved this using a pinch point that nicely frames the vast feeling environment and ruins within the first few minutes of playing.
The second design goal was to create the feeling of journeying off the beaten path, so I made sure to include traversal, platforming, and navigational challenges to support the theme.
I knew some of my play testers were unfamiliar with Far Cry 5 so this area offers threat-free sections and traversal challenges to practice controlling the player character, and combat encounters where the player has approach advantage and stealth options.
Pacing Intents
-
Ease the player into the game and setting.
-
Easy enemy encounters presented as stealth takedown opportunities.
-
Immediately peak curiosity by teasing the distant ruins and establish a player objective.
2D Layout
Development Highlights
2D Layout > Blockmesh
-
The starting area was redesigned; originally the player started in an enclosed ravine, I changed this in blockmesh so the player starts at a higher area, and passes through a pinch point which frames the distant ruins.
-
I made the start and end of the level connected so the player does a 'full loop' upon completing the level.
-
Developed an idea for an optional hidden item inside the cave section.
-
Created obstacles to duck and jump over in the Ravine to make passing through this longer route more interesting.
Blockmesh


Development Highlights
Blockmesh > Playable Build
-
The final area (Escape Route) was redesigned which affected the starting area, most notably the level starting route now passes under a bridge, that bridge is part of the route leading to the level end. I wanted the player’s path through the level to intertwine as much as possible to feign a sense of openness and mask the level’s linearity.
-
An optional pickup reached via a hidden route inside the cave was removed. It didn’t feel necessary during my test runs, I wanted the player to focus on finding their way through the cave.
Playable Build


The ‘Pinch Point Framing’ player view (image A), and a birdseye shot to show how the level start and end areas overlap (image B).


This image sequence shows the player moving through an area where they are baited into reaching a platform only to discover the gate is locked, using the higher ground they can then discover a hidden alternative route and reach it by platforming across boulders.
Playtester Feedback
Feedback
There were quite a few traversal exploits meaning player’s could escape the level’s boundaries, or skip platforming sections.
What I did?
-
These were easily fixed with blocking volumes.
-
I exaggerating gap and platform distances to signal ‘don’t attempt’.
Feedback
All my testers liked and had no issues solving the ‘locked gate > find an alternative route’ problem.
Feedback
Playtesters were able to use stealth approaches to take down the few enemies here, but the ai was inconsistent resulting in some detections I felt were unfair on the player.
What I did?
-
Removed 1 npc which was patrolling back and forth along a path between 2 other npc's patrol areas. This stopped the ai being able to 'chain link' alert if the first enemy noticed the player.
-
Moved a remaining enemy's spawn position further away, then had them move to their patrol position via an eye catching route so the player could spot them earlier and plan their approach.
or
Continue down to the next area?
Level Area 2
FROZEN POOL
Stronger Enemies - Stealth Route - Navigation Challenge
Area Summary
The player travels along a frozen river and arrives at a frozen pool. Armed guards are distracted by something, stealth or engage?
Investigating a frozen waterfall reveals a manmade walkway with doorways hidden within a cave behind the icy barrier, how to get in there?
Exploring the frozen pool surface reveals a hole in the ice leading to the water below, where the player must navigate a rocky underwater environment to discover a way into the cave behind the waterfall.
Final Playthrough Video
This video begins after the player passed through 'The Cave' at the end of the 'Mountain Trail' section and finishes just before entering the 'Generator Area'.
Level Design Key Points
-
Multiple approach enemy encounter, stealth route option.
-
Landmarking using large frozen waterfall.
-
Secret entrance plays into the level’s early covert themes
-
Underwater navigational challenge adds traversal variety.
-
Fallen satellite dish used as eye catching prop and explains the large hole in the ice surface.
-
Player sightlines controlled using ground elevation at area entry; obscure enemy spawn in, frame waterfall, easily notice enemies.
-
Bonus weapon hidden in pool rewards exploration (Silenced SMG).
-
Dead animal prop used as npc 'distraction'.
-
Opportunity to gain the assault rifle weapon from enemies (helps in next area).
Development
Frozen Pool
Design Intent
I wanted to create a hidden ‘backdoor’ entrance into the facility, the ‘secret entrance behind the waterfall’ was a classic trope I had in mind for this moment.
The frozen environment added a nice twist to this setup, turning the waterfall into a ‘see through wall’ to tease a future area, and the pool itself became a hazardous obstacle to navigate.
Pacing Intents
-
Introduce some tougher enemies while still giving the player the upperhand.
-
Serves as a memorable and cool ‘you found a way in’ moment.
2D Layout
Development Highlights
2D Layout > Blockmesh
-
Simplified the underwater area.
-
Simplified the ‘Stealth Route’.
-
Added a building and entrance near the pool edge to suggest this is where the enemies on the pool had arrived from.
Blockmesh


Development Highlights
Blockmesh > Playable Build
-
Added a dead animal prop which the enemy guards are plausibly investigating, creating an enemy distraction for the player to exploit.
-
Made stealth route cover options bigger to make easier to hide.
-
Altered the layout of the underwater area so it’s more maze-like.
-
Used a tall satellite tower (dud structure) as the ‘enemy entrance’ onto the ice surface. This also draws the player into search there, putting them in a position so they discover the hole in the ice.

Final Frozen Pool surface birdseye view.


Blockmesh (A) and playable build (B) subsurface layout differences.
Playtester Feedback
Feedback
Players got lost underwater, turned around, some felt this was a ‘bonus optional area’.
What I did?
-
improved guidance in the underwater section; reduced water occlusion, light rays and bright stones used as breadcrumbing / landmarking.

The image above shows how dark and disorientating it was underwater.


The 3 images above show the guidance improvements applied after player feedback.
Feedback
Players uncertain where to go next after dealing with the enemies. Some do progress but mostly by luck. Players struggle to formulate my intended objective.
What I did?
-
Increased visibility through the frozen waterfall ice barrier.
-
Used a soft light to increase the cave’s interior brightness, this also highlighted the water surface providing a route clue.
-
Increased the strength of the flickering lights on the walkway to grab attention.


(Image A) before play tester feedback, and (Image B) showing the amendments.
or
Continue down to the next area?
Level Area 3
GENERATOR AREA
Navigation Challenge - Fire Starts - Combat
Area Summary
The player enters into the dark industrial underbelly of the facility and a locked gate appears to be the way forward, but where is the key?
While exploring they repeatedly find views into a generator machine room where a key can be seen… but how to get in there?
A hidden way into the Generator Room is found requiring a drop down onto some pipes, CRACK, a pipe breaks, water gushes out over the generator’s control console, shortly afterward a huge fire breaks out… alarms and warning lights punctuate the previously silent spaces.
Enemies arrive to investigate, they are between the player and the locked gate, the only way through is to fight.
Final Playthrough Footage
This video begins after the player swam under the ice of the Frozen Pool (area 2) and finishes once they make it into the Utility Tunnels (area 4)
Area Phases
This area is broken into 2 phases:
Phase 1 - Find the Key to get passed the locked gate.
World Event - Fire breaks out, Alarms trigger
Phase 2 - Fight through enemies and reach the gate while fire engulfs the area.
Level Design Key Points
Phase 1 - Find the Key
-
area forms a maze-like space to explore, contrasts previous areas which were linear/simple.
-
landmarking used to help players form a mental map of the area e.g. water tanks, generator machine, unique obstacles.
-
repeatedly tease views of the Key item to reinforce it as the current objective.
-
lighting used to draw attention to important elements e.g. locked gate, key, pipe route clue
-
one-way gates used to control player’s movement through certain sections
Phase 2 - Combat
-
shotgun pickup offered, fun and effective in the upcoming combat encounters.
-
area tone and hazards totally transform for the combat phase, using fire and alarm effects to create sensory chaos.
-
used highly contrasting visuals and audio to add impact to a major pacing turning point.
-
used visual effects and geometry to break up sightlines and create an intensified combat experience, while only using a few enemies to keep the true difficulty lower.
-
cover designed to give the player an advantage
-
optional vantage route + bonus room
Development
Generator Area
Area Design Intent
I wanted the gameplay and atmosphere to strongly contrast the previous outdoor areas, to achieve this I designed a maze-like area so the player feels a bit lost, and then used a locked gate which requires the player to explore the area and solve a puzzle to gain a key to progress.
I also wanted to use this area to stage the player’s first direct confrontation with the enemy, so I set about devising a way so that solving the area’s ‘get the key’ puzzle results in enemies plausibly storming the area.

The Spreading Fire
In the early concept stage I had the Fuel Store Area (part 5) as the origin of the fire that consumes the level, but while designing the Generator Area I decided the fire would start here instead to:
-
amplify the ‘Stealth > Action’ pacing turning point
-
act as a tool to push the player forward through the underground areas
-
intensify underground combat encounters
-
expand on the use of the Fire Spreading theme for a stronger level identity
2D Layouts
Area Redesign
There are 2 layout versions because this area went through a redesign and rebuild, outline of dev stages:
Version 1
Layout V1 > Blockmesh V1 > Playable V1
Playtester Feedback and my own grievances lead me to rework the design.
Version 2
Layout V2 > Playable V2
Development Highlights
2D Layout V1 > Blockmesh V1
-
Extended the Upper Walkway in the Water Tanks room for enemies to shoot from.
-
Made the Generator Room larger, more machinery, more desire to explore.
-
Lengthened route player enters into combat along, idea was to allow some longer ranged combat.
Blockmesh V1
This blockmesh gallery includes summary's of the area being played through. Select an image to see more.


Development Highlights
Blockmesh V1 > Playable V1
-
Overall I made the spaces smaller to create a claustrophobic feeling and further contrast the previous outdoor areas.
-
I moved the ladder leading to the Upper Walkway so it can be accessed quicker during the combat phase, giving the player a vantage route.
-
Added a bonus supplies (grenades and ammo) room accessed via the Upper Walkways which can be accessed ONLY after the Key Item is collected from the Generator Room.
Playable V1


Images above show the overall layout and an example view inside the Water Tanks room during the combat phase. Select image to expand.

(gif above) The player had to line up a shot with a fuel container, the explosion then blasts open a wall creating an entrance into the Generator Room below.
Development - Redesign
Playtester Feedback V1 > Playable V2
Feedback V1
‘Shoot the Fuel Tank’ and ‘the Explosion Created an Entrance’ just didn’t work.
Players fumbled their way through this sequence, and on reflection I felt it didn’t make much sense to be blowing things up while being stealthy, but I still wanted the Fire to start here, so I found a solution.
How did Playable V2 address this?
-
Redesigned the whole area around an alternative, simpler idea for getting into the Generator Room, and starting the fire.

(gif above) The player finds the hidden entrance behind the Water Tanks, dropping down they break a water pipe which damages a control console, leading to a fire, alarms, and enemies arriving shortly afterwards.
Feedback V1
Playtesters became lost, struggling to understand the area layout. The 2 stairwells looked identical causing confusion.
How did Playable V2 address this?
-
made the play spaces slightly larger; specifically the Water Tanks room to create more room during the combat encounter.
-
Reduced major sightline breaking structures to help player and npcs see more clearly.
-
added more landmarking throughout area
-
made the area slightly brighter overall
Playable V2 - Locked Gate


(image A,B) a green light is used to catch the players eye as soon as they enter the Water Tanks Room so they notice the main Locked Gate and mentally note it.
(image C) looking through the Locked Gate the next area is teased and straight ahead a green lit ladder can be seen, further hinting ‘this leads somewhere!’.
Playable V2 - Stairwells


To differentiate the 2 stairwells:
-
stairwell A (image 1) uses a vaulting obstacle
-
stairwell B (image 2) is partially hidden by boxes, lacks an obstacle like stairwell A, and at the bottom features a collapsed flooded hallway (Image 3).
Playable V2 - Teaser Views


(image A above) shows the player’s view when they first enter the Generator Area. The circled crack and debris on the floor are intended entice the player to look through.
(gif B above) show what the player can see through the crack, Blue Pipes (route clue) and table with a Shotgun and Key.


The images above show multiple views into the Generator Room which are intended to reinforce the player’s inquisitivity to get in there.
(images A, B) These views particularly frame the Blue Pipes ( connected to Blue Water Tanks above), as a clue how to gain entry.
(Image C) is a grate which helps the player understand the Generator Room is below the Water Tanks Room.
Feedback V1
Some playtesters became distracted once the fire started and forgot about collecting the Key.
How did Playable V2 address this?
-
The fire only breaks out once the player has already entered the Generator Room via a 1-way gate, and a locked gate means they must collect the Key before they can progress.
Feedback V1
Combat felt static, limited cover options, not enough space for the player to engage the enemy in more interesting ways.
How did Playable V2 address this?
-
Larger spaces for longer range combat engagement, flanking maneuvres etc
-
More places enemies “could be” hiding, encounter feels more threatening.
-
Far more cover options (aqua shapes in images below)
-
Gap added to upper walkway gives the player a vantage point over enemies who are positioned below.
-
Added more ‘Explosive Barrels’ for the player to use against dug-in enemies.
Combat Phase


Images above show combat design overlays for the ‘Water Tanks Room’ and how they changed between V1 (left) and V2 (right). Aqua shapes represent player cover options.
or
Continue down to the next area?
Level Area 4
UTILITY TUNNELS
Flamer NPC Encounter
The previous area is completely engulfed in flames, and enemies know the player is here. Making their way through the dark tunnels, flames suddenly spray out from around a corner and fill the darkness, a frenzied enemy wielding a flame thrower appears and spearheads a surprise attack!
Final Playthrough Video
Video starts just after the Generator Area (Area 3) and ends at the ladder before entering the Fuel Store (Area 5).
Level Design Key Points
-
Visually striking surprise enemy attack is exciting
-
Retreat space and choke point to tilt the encounter in the player’s favour.
-
Reinforce that the fire is spreading, heightens pressure to move fast, surprise encounter more impactful.
-
Teases a future area (grappling rope item)
-
Body Armour and Health Packs placed to ensure player collects to survive this fight.
-
Explosive barrel placed so that the player can take out the Flamer by playing tactically.
Development
Utility Tunnels
Design Intent
I’d been playing the Resident Evil 4 Remake, and there is a moment where a terrifying bullet sponge enemy causes the player to retreat only to be surprised by 2 low tier enemies that weren’t there earlier. The intent of this area was to do something similar.
Resident Evil 4 - Reference Moment
FC5 Flamer NPC Encounter
I used the Flamer NPC as my 'RE Chainsaw Guy' substitute because their attacks are dramatic, they fit into the 'spreading fire theme', and they’re a decent bullet sponge. To amplify the encounter I built claustrophobic spaces, and to help the player I created a retreat area with supplies, strong line of sight, and cover to out-maneuver the enemy.
2D Layout
Development Highlights
2D Layout > Blockmesh
-
Moved the Retreat Room so there is a line of sight for the player to shoot down the tunnel at the approaching flamer npc.
-
Adjusted a doorway recess to avoid player frustration if backing up and becoming trapped.
Blockmesh


Development Highlights
Blockmesh > Test Playable V1
-
Made the entire area more condensed as a test to see how the Flamer encounter plays out.
-
Reduced cover options.
Test Playable V1
Feedback
Deat, Death, Death, Confusion, Death.
It didn't really work, but why?
Flamer Enemy Encounter
The player character is likely to catch fire on initial contact with the Flamer enemy npc. Naturally the player then seeks safety, BUT my low tier enemies blocking the retreat space were now deadly against the vulnerable and confused player.
This lead to an unfair and frustrating death, no good.
Development Highlights
Test Playable V1 > Playable V2
-
Reverted to a design closer to my original blockmesh which was bigger overall.
-
Better thought out cover options
-
Longer tunnel to Retreat Space, player can put more distance between themselves and flamer npc
-
Explosive barrel placed to tactically use against the Flamer npc
-
Simplified retreat space for better flow
-
Added a teaser view into a future area (this was added later in development during a larger redesign)


Top shots showing differences between (image A) test playable v1 and (image B) playable v2.


View from the retreat room. the player has a clean sightline to attack the flamer as they close in. Just before the flamer reaches the retreat room there’s an opportunity to use an explosive barrel to take them out.
Cover Design
I did some research into cover design while revising this area. A YT video gave me some principles to work with, and I've used the retreat room to highlight what I learnt applied.


In Playable V1's space I had inadvertently created 'movement traps' (red boxes). Players can accidently strafe or back into these during combat, and it disrupts flow, possibly resulting in a frustrating death, especially in a tight space like this.
In Playable V2 I simplified the outer edges to avoid trapping the player and created a 2nd central cover choice, this increases movement lanes (blue arrows) for the player to out maneuver the enemy. Using lower cover (orange boxes) I created a sightline opportunity (yellow dashed line) which helps the player keep track of and engage the enemy.
Future Pickup Teaser

This is the ‘ Collapsed Stairwell' which is part of the Ruins Ascent (area 7). This was added here later in development when the Ruins was redesigned to include a Grappling Hook traversal section.
This room is a teaser view of the bottom of a stairwell were the Grappling Hook Pickup is located. I set up a small scene implying one of the enemy troops had plummeted to their death, this unique scene is more likely to stick in the player's mind so they will recall it later when they require the Grappling Hook. When they finally enter the area they'll know where they are and get the satisfaction of tying up the mystery behind the odd scene.
You reached the exit ladder and climb to safety...
or
Continue down to the next area?
Level Area 5
Fuel Store
Explosive Puzzle
Area Summary
After surviving the encounter with the Flamethrower NPC, the player progresses up a ladder and enters a tiny room filled with fuel barrels and gas cannisters. The outside world can be seen through a damaged wall, if only it was safe to blow it up.
To make matters worse, the fire from the previous area is spreading up the ladder behind them, they must find a way forward before it's too late.
Final Playthrough Video
The video starts just after the Utility Tunnels (Area 4) and ends as the player arrives outside at the base of Fire Fight Tower (Area 6).
Level Design Key Points
-
using explosive objects in a creative way to create a puzzle
-
dramatic escape from the underground areas
-
maximum tension; the fire from previous areas is close behind, the player is cornered!
-
guidance techniques used to help the player realise the solution
-
bi-directional design; once the explosion occurs, the area becomes an obstacle course of fire and debris to navigate.
Fuel Store
Development
Incomplete Section
Design Intent
The idea for this area came out of experimenting with explosives in my FC5 gym map.
I envisioned a puzzle involving the player triggering a domino-effect barrel explosion in a confined space, where the solution requires they find the single safe place to trigger the massive explosion, which results in an exit route being created.
2D Layout
Blockmesh


Playable


Level Area 6
FIRE FIGHT TOWER
Fire below, enemies ahead.
Area Summary
Emerging from the fire ravaged internals of the facility the player can finally breath.
Exploring leads to a courtyard, where the fire can be seen churning away in a room below. As the player makes their way up a floor, the fire below spreads up too. Enemies pour out onto the walkways ahead and above, a fierce fire fight across multiple floors to survive ensues.
Once at the top, the player discovers a zipline, it’s the only way to escape the inferno below!
Final Playthrough Video
The video starts just after the Fuel Store (Area 5) and ends once the player reaches the top of the tower and ziplines across a chasm to reach the Ruin's helipad (Area 7).
Level Design Key Points
Before Tower Combat
-
Resting area, chance for player to reorientate, and formulate their next route.
-
Expansive outdoor views contrast the previous underground areas, adds to the feeling of ‘finally I’m out and can take a breather!’
-
This calm area resets the player’s baseline emotional state so the next combat sequence has more excitement impact.
During Tower Combat
-
Fight through waves of enemies; progressively more challenging as the combat sequence plays out.
-
Variety of combat encounter enemy position layouts utilise the buildings structure in interesting ways.
-
Micro-pacing taken into account; broke up the longer combat sequence; resting points, strong, and exposed player positions.
-
Ascend a building while fire climbs close behind, no retreat, high tension, dramatic!
-
Smoke used to increasingly obfuscate sightlines; combat challenge augmented
-
Explosive Moment; an enemy position is littered with explosive barrels, take them all out in one spectacular boom, rewarding for player.
Fire Fight Tower
Development
Incomplete Section
2D Layout
Blockmesh
This gallery is fully annotated, showing you how the player moves through the area and how the combat encounter waves work. At their core the Blockmesh and final Playable build are very similar.


Level Area 7
RUINS ASCENT
Surprise Combat, Grapple Hook Item, Traversal
Area Summary
The player ziplines across a chasm toward a seemingly empty helipad, as soon as they land they are pinned down behind scant cover by gunfire from the ruins. Enemies charge the player in the open routing them, chaos ensues.
Once inside the ruins the player must explore and find the Grappling Hook Item in order to climb up to the rooftops. Once the Grappling Hook is found the fire spreads into the ruins, transforming the area into a hazardous obstacle course.
Overcoming the flaming ruins using the Grappling Hook, the player discovers an enemy supplies cache and a way onto the rooftops.
Final Playthrough Video
The video starts just after the Fire Fight Tower (Area 6) and ends once the player reaches the way onto the Rooftop (Area 8).
Level Design Key Points
Helipad Combat
-
Player thrown into a surprise disadvantageous combat encounter, short and intense.
-
All bark no bite; the obscured enemy shooter locations make it feel like the threat is bigger than it is. The focus here is shock.
-
Put the player on guard before entering the ruins “there could be enemies inside too”.
-
Foreshadows helicopter combat later in the level.
Inside The Ruins
-
Bi-directional design; environment transforms leading to a more challenging backtracking route.
-
Skill-gating; player becomes trapped and must use a newly acquired skill to escape and overcome newly formed hazards.
-
Contrasting experience; there are no enemies in this area, the focus is on traversal. This dramatically contrasts the next area’s intense combat, adding more punch to it.
-
Reward Chamber/Foreshadowing Big Fight; once the player overcomes the obstacles they pass through a room filled with supplies to prepare them for the ‘Boss Encounter’ up next.
Ruins Ascent
Development
Incomplete Section
Late Addition
Ruins Ascent was created later in development to address a broader pacing issue, I cover this in more detail in Ruins Rooftop (Area 8).
Design Intent
The helipad serves as a surprise combat encounter to keep the player on their backfoot and maintain a sense of uncertainty. Originally it marked the beginning of the level’s climactic combat encounter, but it was repurposed later into an easier ‘shock’ encounter.
The inner ruins was created to add some experience variety; it’s traversal focussed and introduces a new ability for the player to use. It provides a nice break between combat, and reinforces the ‘Spreading Fire’ theme by using it as a hazardous obstacle in a new way.
2D Layout
Blockmesh


I built the Ruins Ascent area near the end of development when I was more comfortable with the Far Cry 5 editor, so there isn’t UE4 Blockmesh work for Ruins Ascent's internal areas. These images show the Helipad which was carried over from my original design and reused here.
Level Area 8
RUINS ROOFTOP
Climactic Battle - Target Elimination
Area Summary
The player has just looted an enemy supplies cache, and found a way onto the ruins rooftops. The Twins are holed up in a Comms Tower nearby, they are cornered.
Once on the rooftop, the player is spotted by a keen eyed enemy sniper nesting on the Comms Tower, and enemy troops come out of hiding and open fire. The player must move along the precarious rooftop, dodging bullets, and avoiding a deadly drop into an inferno raging in the ruins below.
Eventually the player gains a powerful sniper rifle of their own, and turns the tables on the elite enemy sniper. Shortly afterwards an attack helicopter swoops in to evacuate The Twins.
The helicopter is destroyed, and with nothing left to lose, The Twins zipline down from their tower to face the player toe to toe.
Final Playthrough Video
The video starts just after the Ruins Ascent (Area 7) and ends once the player has eliminated the Target Enemies reaches the Escape Route (Area 9).
Level Design Key Points
-
1 way gate locks player into combat arena
-
Enemy sniper with a laser adds a new threat to deal with
-
Fire in the ruins below add to the climactic atmosphere.
-
Player gains a high powered Sniper Rifle, new weapon adds fresh tactic to combat.
-
Main combat arena has lots of cover options and combat supplies to aid the player
-
Attack waves are carefully used to avoid overwhelm and add pacing in the lead up to the tough Bounty Targets ‘The Twins” entering combat
-
Surprise Attack Helicopter; new exciting foe type
-
Option to take down the elite sniper enemy by blowing up the tower they’re on
-
Low tier enemy npc used as guidance to attract the player towards the exit route once the main Targets are eliminated.
Ruins Rooftop
Development
Design Intent
This is the boss encounter area, so I wanted it to feel epic, and pose the most challenging combat encounters.
Early in development I’d decided I wanted an attack helicopter to surprise the player in the lead up to the confrontation with the Bounty Target npc, I felt this would make the encounter stand out and be memorable. The attack helicopter also serves as the ‘evacuation’ narrative element.
I planned on the Bounty Target npc being an Elite Sniper class, this changed later. The idea was the player would have to very carefully use cover to reach the Bounty Target before being able to eliminate them, during which the attack helicopter would swoop in to mix things up.
Development Outliner
This area went through a redesign and rebuild, here is a summary of development:
-
2D Layout V1 > Blockmesh V1 > Playable V1 > V1 Improvised Fixes
-
V1 feedback and pacing issues lead to a redesign.
-
2D Layout V2 > Playable V2
2D Layout V1
Map 7 - The Ruins V1 - Archived
In early development The Ruins was one long combat sequence starting at the Helipad, leading up to the player eliminating the Bounty Target npc and then beginning their escape.
Development Highlights
Blockmesh V1 > Playable V1
-
Moved the bounty target npc to a tower overlooking the main combat arena, the idea was to defeat the target by taking a precise shot which causes the tower to spectacularly explode.
Blockmesh V1
This blockmesh gallery is fully annotated and walks you through my original design.


Development Highlights
Blockmesh V1 > Playable V1
My original design didn't work.
Problem
My testing revealed the enclosed combat arena with huge openings in the walls didn’t work; the attack helicopter ai would lose track of the player and idle, sometimes even landing and the pilot would just get out and go for a nice walk.
What I did?
I improvised a different design directly in the FC5 editor where the final combat arena is a higher, exposed area. This fixed the attack helicopter issues.
Playable V1

Development Highlights
Playable V1 > Playable V1 - Improvised
-
Added a 2nd target npc, ‘The Twins’ concept was created. This was to compensate for the fact the enemy npcs were quite easy to kill, so doubling them up improved the ‘Boss encounter challenge’.
-
Changed the Target npc from an Elite Sniper class to an Elite Assault class, for a better close range fight.
-
Made target npcs zipline from a tower into the combat arena for a cool ‘boss entry moment’.
-
Tower explosion event now the trigger that forces the target npcs out of hiding.
-
Expanded on the platforming route idea where the player exits the ruins crossing over a fiery inferno below.
Playable V1 - Improvised

Redesign
Playtester Feedback V1
-
Target enemy ‘Elimination Moment’ getting lost in the chaotic combat.
-
Non stop combat for too long, more difficult than I intended.
-
Testers liked the platforming exit route above the inferno.
Solution
The Ruins V1 was scrapped, and 2 new areas took it’s place:
-
Ruins Ascent - Level Area 7
Traversal focussed, break from combat.
-
Ruins Rooftop - Level Area 8 (current read)
Grand Finale, 'Bounty Targets' Encounter
This work was done to improve pacing and apply ideas I’d developed after play tester feedback.
2D Layout V2
Development Highlights
2D Layout V2 > Playable V2
-
Main combat arena made much bigger to improve movement flow.
-
More cover options, including collapsed ceilings providing cover against the attack helicopter.
-
More supplies, and spread apart to entice player movement / exposure from cover.
-
Enemies spread out for more interesting combat
-
Fire and smoke utilised - as the player progresses through this area, fire and smoke increase steadily for a more dynamic, tense feeling environment.
-
Simplified and less risky platforming escape route, want to avoid player death after surviving so much combat.
Playable V2

Combat Wave Design
A persistent issue in Playable V1 was that combat waves felt indistinguishable so I paid particular attention testing and balancing how the enemy waves are structured.
Wave 1
Starts as soon as the player enters the area.
-
Generic low and mid tier enemies, dotted around the ruins sparingly.
-
Elite Sniper unit - has dominion over entire area, shoots from Tower overlooking rooftops. Player must time their movements between cover to avoid taking devastating damage.
Wave 2
Starts once the Elite Sniper Unit is terminated. Their death results in the Tower exploding in flames, or vice versa.
-
Attack Helicopter swoops in, 1 vs 1 against the player.
Wave 3
Starts once the Attack Helicopter is destroyed.
-
The Twins (Bounty Targets) appear, they zipline down from the Tower and onto the Rooftop where they battle the player.
"Wave 4"
Starts after a short delay once The Twins are eliminated.
-
A single low tier enemy appears at a newly opened door, they function as guidance to attract the player’s attention to the exit.

A graceful exit
Level Area 9
ESCAPE ROUTE
Exit in sight, SURPRISE! Armoured Trucks Arrive
Area Summary
After eliminating The Twins, defeating an attack Helicopter, and surviving the raging inferno consuming ruins behind them, the player makes their way along an eerily quiet route towards the heavily forested facility entrance gates.
At the last moment a convoy of armoured trucks full of enemy reinforcements arrive! The machine gun mounted trucks block the exit gate while troops spread out. Taking a stealthy route the player will discover a horde of combat supplies, including a much needed grenade launcher.
Blasting their way through the enemies and past the perimeter fence, the player discovers an abandoned vehicle, and begins their journey to safety.
Final Playthrough Video
The video starts just after the Ruins Rooftop (Area 8) and ends once the player reaches the tunnel road (level end).
Level Design Key Points
-
Subvert player expectations; they just beat the boss during a climactic battle, the exit route appears clear, but surprise enemies block the exit.
-
No supply pickups in the lead up to the surprise encounter, this is to avoid foreshadowing.
-
Feel Powerful; I design the area to guide the player towards a strong cover area where they will discover a huge supply cache and a ‘Grenade Launcher’ weapon, this is so they can dominate the encounter for a fun explosive level ending.
-
1 way gate used to lock the player into the ‘surprise encounter’ combat arena.
-
Lots of cover options and multiple routes the player can take to flank the enemy machine gun trucks.
-
Explosive barrels placed near the trucks for some extra spectacular destruction oomph
-
Exit gates take a dominant position + lighting used to provide a clear landmark objective for the player.
Escape Route
Development
Design Intent
Originally I wanted this area to act as a gruelling fight to the exit, where the player is pinned down by heavy gun fire from machine gun mounted trucks positioned across a bridge, there’d be a moment the player gets to use an RPG launcher to destroy the armoured trucks and then fight close quarters through a gatehouse building before ziplining out the level to safety.
Redesigned
Later in development I decided to change the design to feel like the level is over but then a surprise encounter takes place within a forested area. This was to add some staging variety, and improve pacing with an exciting ending where the player gets to unleash all sorts of weapons.
Development Outliner
-
2D Layout V1 > Blockmesh V1
-
I redesigned the area to improve pacing.
-
2D Layout V2 > Playable Build
2D Layout V1
Development Highlights
2D Layout V1 > Blockmesh V1
-
Very little design deviation
-
entry platform made a bit larger so bigger gaps between cover.
-
sniper unit added to a tower overlooking the area nearby. Snipers were very useful for tagging the player early in a combat encounter, which then notifies the other enemies to engage.
Blockmesh V1
This gallery is fully annotated and takes you through my original design.


Escape Route
Redesign
I reworked this area to improve pacing. It takes place after the ‘grand finale battle’ on the Ruins Rooftop (area 8) where the player fights the ‘bounty targets’ and an attack helicopter, so this felt like a golden opportunity to:
-
catch the player off guard by tricking them into thinking the level is over
-
a chance to stage an encounter in a forested environment which added some extra variety for me as a designer.
2D Layout V2
Development Highlights
2D Layout V2 > Playable
Playtester Feedback
-
Initial tests proved the area was too difficult, I reduced the total enemies and swapped out a few tougher enemy types for mid tier generics.
-
Removed the enemies from the Dish Tower (layout v2) so the player isn’t unfairly spotted too early.
-
I improved cover throughout the area, further tilting the odds in the player’s favour.
-
I removed some trees to improve sightlines.
Playable

Playable Design Highlights
-
‘quiet lead-up’ route before surprise exit combat encounter
-
Multiple routes the player can take to flank the Gun Mounted Trucks.
-
Switched the ‘power weapon’ from RPG to Grenade Launcher, this felt less OP and more fun to use (get to shoot more explosive shots before the trucks explode, cool arcing projectile)
-
Intertwined the Level Start and Level Exit routes more clearly for a ‘full loop’ journey effect.
Grenade Launcher


I focussed a lot of attention on guiding the player towards the Grenade Launcher location.
I did this by:
-
having an enemy blocking the ‘obvious’ path. The enemy is out in the open, and unaware of the player’s presence, so the player is likely to take a stealthy approach (image A)
-
using lighting and breadcrumbing to guide the player where I want them to go (image B)

Image C shows the Grenade Launcher (supplies) location, it is highlighted using lights, which are immediately noticeable upon entering via Route A.
A guard who can be easily sneaked up on (image C) functions as a 'combat trigger'. Route B offers a safe way off the platform into rocky cover.
Big Bada Boom

The machine gun mounted trucks are deadly and pretty tough. To shift the encounter in the player's favour and to add extra big satisfying explosions I placed explosive barrels near the trucks.
This makes it much easier to:
-
land a devastating grenade launcher shot
-
flank the truck positions and destroy them with a carefully aimed bullet.
The End


Broad Development
Preproduction
Concepting - Testing - Planning
Starting Point
I designed the level around the Far Cry 5 Bounty Hunt gamemode which entails eliminating an NPC target, and then optionally escaping to an extraction zone. I envisioned the level to be a unique set-piece location only accessible during a pivotal main mission set within the Far Cry 5 world.
I began to imagine a level that has the player stealthily breaking into an enemy stronghold, at some point being detected, maybe an ambush, and then they have to fight their way through enemies before the Bounty Target can escape, only for the tables to be turned on the player at the last moment in a surprise boss fight scenario forming the level's climactic beat.


My Sketchbook work
Capturing Ideas
As I come up with ideas I create rough sketches, diagrams, and written notes that capture concepts and how they might work. I like starting with writing as there’s more interpretive space for my imagination to play with, then I'll flesh out a written concept with sketches. To help with creativity I'll research games and movies, collect reference imagery, take photos, and bounce ideas off friends.

Example Reference Collection
First Idea - The Canyon
My very first idea involved a fortress complex built inside and along a canyon, bunkers and towers built into the sides of the cliff walls, with bridges connecting either side, some broken requiring risky platforming segments, the overall setting creating a naturally linear map with plenty of ranged combat opportunities and traversal challenges.
I imagined the Bounty Target would be dug in at a well defended bunker at the deepest end of the canyon, and the level would progress from large to smaller spaces as a core theme and pacing technique.

Example Reference Collection
Idea Shift - Alpine Comms Station
I shifted location to a high alpine environment with a ruinous Communication Station nestled amongst its peaks, somewhat influenced by watching a few James Bond movies around this time.
Early on I had an idea for a secret entrance behind a waterfall, changing theme to the icy environment and 'Freezing' the level led directly to the idea for the Frozen Pool (Area 2).
Bounty Target Encounter

Reference Scene from Top Gun: Maverick
I had a scene in mind where the player reaches the top of a crumbling tower or peak and encounters the Bounty Target who is cornered, during the fight an attack helicopter swoops out of nowhere to mix things up. I really liked this idea to make the final showdown stand out, and throw the player off balance, so I fixed it for the level’s climactic beat.
Event Timelines &
Narrative Script
As my ideas built up I started to think about how they might fit together, support a core theme, imply a narrative, and in what sequence their pacing qualities might compliment or contrast each other. I started to formalise my ideas by creating written Event Timelines.
I also established a basic narrative to help contextualise the player’s objectives, and created a script to read out to play testers at specific level checkpoints to mimic what would be in-game mission updates.
Event Timelines
Narrative Scripts
The 'Event Timelines' PDF contains the 'Canyon Fortress' idea and the 'Comms Station' which this project is based on.
Timeline Graphic
This infographic summarises my level early in development. Scroll to the right in the PDF viewer to see the rest of it.
Fire Spreading Theme

Fuel Store and Fire Fight Tower
fire spreading concept.
While thinking about how areas might interrelate a connection between a puzzle obstacle area (Fuel Store) and a subsequent combat area (Fire Fight Tower) formed.
The Fuel Store solution results in a fire breaking out, initially this was going to be isolated, but I thought it would be interesting if the fire spreads up into the next area, adding an exciting element to the tower's combat sequence.
Fire spreading through the ruins and chasing the player became a core theme. Later in development the fire's origin was changed to an earlier area (Generator Area) as it fit better with a major turning point in the level's pacing.
Far Cry 5 Gym
I built a gym map to refamiliarise myself with the editor and as a space to experiment and test my ideas.


Main takeaways from the Gym:
-
Learnt how to get the enemy npc's to use vehicles - the ai must chose to use the vehicle, there isn't an 'assign to vehicle' parameter.
-
Tested helicopter combat - Learnt to use the LMG or Flamer unit as the pilot because they can take more damage, other npcs are too easy to kill.
-
Decided on a modular structures palette and environment assets.
-
Got a feel for the player character's metrics.
-
Tested out all sorts of weapons, and enemy types in combat.
-
Chose the Bounty Target - a sniper NPC who was particularly tough to kill earned the lead role. He was demoted later in development when it turned out he had an invincibility glitch.
-
There's no way to toggle particle effect objects such as smoke in the editor, so I had to use placeholder effects during prototyping.


I created a diorama to experiment with scripting fire and learning how it interacts with various assets. This lead to ideas about how I might use explosive objects for a puzzle, this lead to developing the Fuel Store (Area 4).

Broad Development
2D Layouts
Once I had an Event Timeline I was happy with and an idea of how each area of the level might work I started creating digital 2D maps to crystalise my ideas.
I approached this by creating 2 types of map:
-
A zoomed out macro layout for overall area composition.
-
Zoomed in area layouts describing more detail.
Macro Layout
The buildings and underground sections are placeholder shapes, here I was focused on how the areas might be placed in relation to each other.
Use the PDF zoom +/- controls if you want to see more detail.
Area Layouts
These are previews of the layouts I created for this project in order of play, there are few maps which have multiple versions, this was due to redesigns.
To learn more about the level areas shown check out the Area Select section of this presentation.


Broad Development
Blockmesh
I used Unreal Engine 4 to establish a blockmesh before committing to a Far Cry 5 editor build.
FC5's editor lacks a few features like:
-
a scene outliner
-
orthographic view modes
-
the ability to group objects
-
object scaling, so I couldn't blockout fast and loose using simple geometry.
So it was far quicker to get the initial layouts drafted in UE4.
Compositional Blockmesh


Use the < arrows > at the image sides to arc around the map
I first blockmeshed the level using giant cube meshes to figure out where I wanted; buildings to go, landmarks, potential vistas, the player’s critical path, and introduce verticality to make the level more interesting to move through.
Streamlining Editor Assets


Once I was happy with the compositional blockout, I created the buildings using a modular kit I made in UE4 which replicates some of the modular building assets available in FC5.
This meant I could figure out general building layouts quickly in UE4, and then simply replicate the buildings inside the FC5 editor.
Final Blockmesh


< Use the arrows at the image sides to arc around the map >
As the blockmesh developed I continually explored using the First Person Pawn built into Unreal Engine 4, using my imagination to ‘play’ through the environments I visualised:
-
how combat sequences might play out
-
where cover could go
-
how the fire could spread through the ruins
-
how the ebb and flow of pacing might work.
Development Summary
2D Layout > Final Blockmesh
-
Player's early path repeatedly frames the Radome (big white sphere on top of the Comms Ruins) as landmark guidance as they get closer to the ruins early in the level.
-
Surrounding towers added as potential sniper nests.
-
Idea to move the Bounty Target NPC to a tower overlooking the Control Centre Ruins, and having the tower be obliterated in an explosion which eliminates the target.
-
HMG trucks arrive in the forest as player travels through the gatehouse during their escape.
-
Forested escape area becomes a 'feel powerful' moment for the player who will have just gained a few powerful weapons and has a dominating vantage point from the Gatehouse Roof.

High Level Process
FC5 PLAYABLE
A high level overview of the stages the FC5 Playable Build went through, including Playtester Sessions.
Playable V1


< Use the arrows at the image sides to arc around the map >
Development Summary
Blockmesh > Playable V1
-
The 'Escape Route' design was changed before reaching a playable state. I dropped the Gatehouse for a larger woodland combat arena where enemies arrive in trucks at the last minute surprising the player and blocking the exit gate.
-
The Control Centre Ruins were extended and modified so the player ends up on an exposed rooftop area, this was done to improve the attack helicopter encounter as there were issues with the original partially enclosed arena causing the Helicopter to lose interest in the player.
-
The Bounty Target NPC was changed from a sniper unit to a pair of tough assault units. Now when the tower is destroyed it triggers the Bounty Targets to zipline down to fight the player on the rooftop arena.
Playable V2


< Use the arrows at the image sides to arc around the map >
Development Summary
Playable V1 > Playable V2
-
I redesigned and rebuilt:
-
the Generator Area to simplify a puzzle and alter a pivotal event sequence so that the player's actions made more sense in the lead up to a fire breaking out.
-
the Control Centre Ruins after getting player feedback and deciding I wanted to alter the pacing. I created a traversal/platforming section inside the ruins as a 'moment of calm' before the player is flung back into intense combat on the Ruins Rooftop. The idea was to create a contrasting experience to enhance the thrill of the level's climactic battle.
-
-
Improved player guidance throughout the level after play testing feedback and observations. Specifically I improved the Generator Area and the underwater swimming route in the Frozen Pool area.
-
Reduced enemies and increased supplies to balance the level's difficulty.
-
Improved flow and cover options throughout combat spaces.
-
Replaced the dev texture colours, added fog, and extra visual effects to create a more immersive environment.
Play Tester Sessions
Playable V1
-
I ran 2 play tester sessions, with each session I tweaked the level.
-
I rebuilt the Generator Area, and had a new tester play through it.
-
As I worked on addressing the issues highlighted by the first 3 testers I made some big changes to the level, notably rebuilding the entire Control Centre Ruins area, which marked arriving at Playable V2
Playable V2
-
2 more playtester sessions were ran.
-
Feedback from these testers was applied and I decided the level was done.
-
I had 1 more tester play the level for the sake of seeing how my previous revisions had affected the level experience.
Testing Notes
I've provided a PDF of notes from the play tester sessions and an internal testing session.
Project Conclusion
This project was a massive undertaking, I set out with the intention of creating a ‘complete mission experience’ and I think the final level as a whole achieves that vision.
I poured as much gameplay variety into this level trying to put into practice all sorts of core level design concepts, and pushed the Far Cry 5 editor to it’s limits in the process. Although it’s not an ideal portfolio piece in it’s entirety, it was a fantastic learning experience.
Key Takeaways
Project Scope
I’ve certainly learnt to reduce project scope since this one. How would I approach this project now? I’d focus on a single area and simply describe in writing how that area fits into a broader level concept.
Combat Design
It’s an action level so I researched how to build more effective combat spaces, use cover, think in sightlines, create encounter variety; using waves to surprise the player, put npcs at a disadvantage to entice risky stealth takedowns, and even use enemy npcs as guidance to direct the player’s attention.
Broad Level Pacing
My first playable highlighted pacing issues during playtesting which ‘muddied’ the climatic ‘boss’ encounter by having too much prolonged action in the lead up. I learnt how important it is to add moments for the player to relax and breath to create contrasting experiences, and that tension and suspense are very important emotions to manage and utilise.
Cognitive Load
Player psychology interests me, and this project allowed me to put into practice managing the player’s cognitive load by planning the level’s encounters through the lenses of ‘passive’ and ‘reactive’ paradigms. Having built such a large level with many encounter types and obstacles it meant with each playtester session I was getting loads of feedback and insight into how the player 'thinks' their way through various obstacles, this was invaluable and has benefited how I design levels ever since.
Thank you for checking out my project!
Testimonials

Clystine Corbin
"Ads made sure I had some nice cover to hide behind."

Buck Whittaker
"I felt right at home
with my big gun."

Hoyt Augustine
"Give this man a job immediately!"