

An action packed linear level, designed using Unreal Engine 4, and built to a playable state in Far Cry 5 editor.
Project: Ice Blast
Introduction
I wanted to build a large action level with a discernible 'start, middle, and end' structure through to a playable state in Far Cry 5, with the goal being to push my design and project management skills, improve my processes and design with broader pacing in mind. I worked on this project around my day job, starting in August 2023 and completing in Dec 2023. It's by far the biggest level design project I've worked on to date.
The prototype level turned out at around 45 minutes play length and is split into 9 areas. The final level features a variety of combat encounters, puzzle challenges, traversal obstacles, a unique world event, and a boss fight. The level is built around the Far Cry 5 game mode 'Bounty Hunt'. The objective being to eliminate specific enemy targets and then escape to an extraction point.
I chose to create a linear level design because I wanted to have direct control over the sequence of events the player encounters so I could construct an implied story around it, and gain experience in sculpting broader level pacing.
Project Goals
-
Gain experience developing a large playable prototype level.
-
Conduct play tester sessions and utilise the feedback to fix issues and improve the design.
-
Develop and demonstrate core level design skills and problem solving.
-
Push myself to manage a larger project.
Tools Used
-
Pen & Paper - Adobe Illustrator - Trello
-
Unreal Engine 4 for blockmeshing
-
Far Cry 5 Editor to construct the playable build
Presentation
Contents
1.
Final Design
Here you can quickly select an individual area of the level to check out in more detail. Each level area features playthrough footage, design highlights, and key developments. You can also take a look at the Final Level Pacing Chart to understand how the broader level fits together.
2.
Project Development
Here you will find an overview of my whole process and outlines of how the level changed through various stages.
3.
Project Conclusion
Project reflections and learning outcomes.
Take Me To The Good Stuff
Blockmesh Gallery
Full Walkthrough of my level design before the playable build began. Includes annotated imagery and lots of design intent covered.
The Generator Area
This is a pivotal moment in the level's pacing and contains a mix of puzzle and combat design.
Level Area Select
Chose an area to see the playthrough video and find out more about the design and development behind it. Also check out the Pacing Chart to understand the broader design.
Areas Map

Area Select

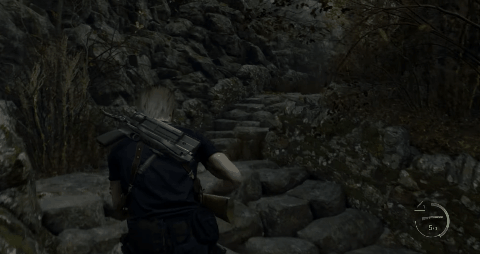
1. Mountain Trail
You're given orders to take out the cornered enemy leaders called The Twins. Begin your journey towards the distant ruins.


2. Frozen Pool
3. Generator Area
Discover a hidden entrance into the ruins by swimming under the ice.
Searching for a key results in a fire breaking out, enemies arrive to investigate.

4. Utility Tunnels
Encounter a Flamethrower equipped enemy in claustrophobic tunnels.

5. Fuel Store
Blast a wall open without blowing yourself up too.

6. Fire Fight Tower
Ascend a building fighting through enemies while a fiery inferno climbs close behind.

7. Ruin Ascent
The coast looks clear, zipline in and suddenly you're pinned down by gunfire, fight your way towards the ruins and once inside find a way up.

8. Ruins Rooftop
The Twins are cornered and the final showdown begins.

9. Escape Route
The exit is in sight, you're close but heavy enemy reinforcements arrive, blow them to bits with a newly acquired weapon.
Pacing Chart
This shows the level's final state. I made it out of curiosity and to help others understand my level's structure. I'd seen similar charts in level design articles and books so thought it would be interesting to create one for this project.
It turned out to be a pretty good exercise in breaking down the more abstract level design experiences into their own categories.
This PDF is super wide, use the scroll bar at the bottom of the viewer or middle click to see the rest.
Level Area 1
MOUNTAIN TRAIL
Level Start, find a way into the ruins.
Area Context
You have tracked an enemy force back to an abandoned Communication Station in a mountainous region. You have been given the order to eliminate the high value enemies 'The Twins', who have taken refuge in the station's ruins. Find a way into the ruins and take them out before they find a way to escape.
Final Playthrough Footage
This video begins at the Level Start and finishes just before 'Frozen Pool' Area 2.
Area Design Intent
-
Create the experience of journeying towards the ruins, establish location, build curiosity seeing distant buildings
-
Player starts with no equipment, offer a few weapon opportunities + supplies
-
Let players get familiarised with basic controls in low threat situations
-
Introduce the presence of enemies
-
Provide some stealthy takedown opportunities to reinforce the early covert theme
-
Exploration and traversal across rugged terrain
Map Summary
The player starts in the Ravine with basic traversal obstacles to warm them up, they arrive at 'Rocky Clearing A' where they encounter their first low rank enemy. Then they enter 'Rocky Clearing B' which features a teaser view into a future area and a hidden platforming path leading to a cave entrance. The 'Cave' offers the player a bonus melee weapon pickup and acts as a way to contrast the towering ruins when the player exits the cave.
Ravine
Design Intent
-
Starting location
-
Narrative delivery opportunity
-
Simple traversal obstacles to get used to controls
-
Enemy free so player can take their time
Narrative Dialogue
To set the narrative context for the level I read out a script to play testers explaining what happened leading up to the character's current situation and what their mission is now. The script read is '1. Level Start - Entry Forest' in the PDF to the right.
Narrative Scripts
Pinch Point Vista


Blockmesh
I moved the starting location so that player reaches a pinch point between some boulders framing the Ruins in the distance before dropping down into the ravine. I wanted the player to notice the huge Radome (white orb) straight away, this acts as a navigation landmark throughout the level. I used the environment to breakup and obscure the view of the Ruins to make it difficult to judge it's true size to create curiosity.
I visually linked the start and end of the level for a looping level design, whereas my original 2D layout had the player start inside a Ravine with no surrounding views.
Playable Build
The level's final area 'Escape Route' was redesigned, I talk about this in the section dedicated to it. The level start/end now features a bridge, which the player passes under at the start of the level and passes over to finish the level. I did this simply because I thought it was a cool way for the player to end the level, being back where you started felt like it tied everything up giving a sense of completion.
Rocky Clearing A
Design Intent
-
Introduce player to a low threat enemy
-
Give player a vantage point entry
-
Provide cover for a stealth takedown
-
One-way gate to lock player into area
Vantage Point Entry

I have the player enter the area from a high vantage point, allowing them to plan out their next moves safely. A low threat enemy offers the player a stealth takedown opportunity, rewards the player with a pistol, and puts the player on alert for more enemies in future areas.
This entry point also acts as a 1-way-gate to stop the player backtracking needlessly if they become lost in Area B.


Blockmesh
I used the rocky surroundings to frame the distant Radome structure letting the player know they're getting closer and which direction they generally want to be moving.
Playable Build
I used a rock face to create a hiding spot for the player to use once they drop down from the entry ledge, the rock face also acts as an obstacle to climb over, briefly exposing the player and risking detection if the player goes for a stealth takedown.
Rocky Clearing B
Design Intent
-
Bait and Switch - I wanted the player to think the 'Platform Gate' is the way forward, but it turns out to be a dead end, from the platform overlooking the area a hidden route across the rocks is discovered
-
Low threat enemy encounter, sightlines obscured by boulders, multiple path approach to allows player to flank the enemy
-
View into a future area, powerful weapon on display
Area Entry


Blockmesh
I made the players entry view frame the partially obstructed view of the platform structure, my aim was to get the player to think 'that's the way forward'. A large boulder in the center blocks the players view, and here I plan to hide an enemy, who will either surprise the player or if the player approaches carefully, they can flank the enemy for a satisfying takedown.
Playable Build
It's fundamentally the same as the blockmesh. I created a stronger sightline towards the platform structure, and have the enemy npc enter the area via the stairs, giving the player an opportunity to spot them before they hide behind the central boulder mass.
Boulder Route


Once the player is on top of the platform structure, they have a good view over the area they just passed through, from this new angle they will discover a hidden route above where they were. I made part of the fence on the platform broken to hint at a way forward. The player is also able to see the ruin's 'Radome' in this area which helps orientate them.
Play Tester Feedback
Successes - The enemy encounter worked well, they were mostly spotted as they entered the area, player's cautiously proceeded for a quiet takedown.
Most player's headed straight for the platform structure, discovered it was a dead end, and then quickly spotted the 'hidden boulder route' and subsequent cave entrance.
Problem - A few players attempted to climb or jump where I didn't want them to, one managed to climb and bypass the whole area, and a few were mistaking certain gaps as possible to jump leading to frustration.
Solution - I made the gaps between 'non jumpable' surfaces further apart, and made walls taller to clearly communicate 'not possible' to avoid players getting frustrated. I also added invisible, smooth meshes to bumpy rocky walls to deny climbing attempts.
Result - A player did attempt to make a jump to bypass the boulder route but the distance was now clearly too far, so they carried on with what they felt was the intended route across the boulders.

Problem - The boulder jump was causing an issue where it was killing the first play tester's characters momentum as they jumped across, causing them to fall.
Solution - I used flat invisible meshes to smooth out the platforming surface, and lengthened the walkable surface to make the jump far easier.
The Cave
Design Intent
-
Find a hidden route to pass through a dark cave.
-
Use this confined area to contrast the subsequent towering ruins view at the cave area exit.
-
Bonus weapon pickup opportunity.


Blockmesh
The 2d layout had a hidden room with a bonus pickup (Pickup B item undefined) inside, in blockmesh I modified this idea and placed the pickup high up and in sight on a ledge which can be gotten to using a hidden crawl space behind.
The see through wall offers the player a glimpse of the exit, and reveals a shovel melee weapon pickup. The weapon is clearly visible through the wall, I used a subtle spotlight to highlight it, however when the player moves through the cave exit the pickup is obscured by the rocky walls, the idea being they get an opportunity to feel smart if they remember the weapon is there, or simply an extra reward for making progress.
Playable Build
In the end I dropped the bonus Pickup B setup opting to get the player moving through this area quicker by focusing their attention on finding the exit. I used lighting behind the 'see through wall' to create contrast against the dark cave to draw the player in to look through and see the cave exit on the other side. I also used lighting to make the snow covered rocks opposite the cave exit appear brighter to draw the player's eye.
Playtester Feedback
Problem - players found the hidden crawl exit too easily, diminishing them feeling puzzled.
Solution - made the walls inside the cave more lumpy and caveated to suggest potential tunnels where there are none, effectively blending the true exit in with a bunch of dead ends. I also used a 'roots' asset to obscure bits of the cave further.
Cave Exit

The Cave Exit sets the player up directly next to the towering ruins which stand high above, this is supposed to be a 'wow' moment. Up until now the ruins have been in the distance, suddenly the ruins loom over the player and look gigantic in contrast to the cave they've just passed through. Once outside the cave the player arrives at a frozen river which forms the path to the next area.
Level Area 2
FROZEN POOL
Stronger enemies, stealth route, navigation puzzle
Area Context
You've followed a frozen river after exiting a cave and reached a frozen pool. There are enemies on the ice distracted by something, there must be a way into the station ruins from here.
Final Playthrough Footage
This video begins after the player passed through 'The Cave' at the end of the 'Mountain Trail' section and finishes just before entering the 'Generator Area'.
Design Intent
-
Gain entry into the facility ruins via a hidden entrance behind a frozen waterfall
-
The player must swim below the ice to find their way into a cave behind the waterfall
-
A hidden bonus weapon as a reward for exploring underwater (silenced smg)
-
A few enemies who outgun you must be approached carefully, the terrain offers a stealth route allowing an evasive approach, or an opportunity to attack at the right moment
Map Summary
more words and more words
Area Entry

The entry point into the Frozen Pool has multiple functions; it acts as a pinch point, framing the Frozen Waterfall ahead, the Pool area is set higher so the player’s line of sight is blocked on approach, allowing the enemy npc’s to spawn in (FC5 build) unseen, and a rock climbing path slows the player down, increasing their chance to notice the npc’s in the center of the pool area.
Frozen Pool
Surface View
Subsurface Layout


Enemies
'impass' in fc 5 sub image
isn't linked to the boundary line.
The enemies are placed in the centre of the area, with plenty of open space around them to make their ranged weapons more threatening and to make the enemies easier for the player to spot. I used boulders to create a stealth route which leads the player to the Ice Hole, allowing them to circumvent the enemies at the expense of gaining an assault rifle and extra supplies.
that you added the dead wildcat and had the enemies interact with, 'distracting them' so the player can slip by, or attack opportunity.
that you revised the layout between bmesh and proto to increase the distance between the ice hole and waterfall cave entrance.
The Swim Route


Exploring the ice surface, the player will discover a cave behind the Frozen Waterfall with a manmade walkway built inside, and a hole in the pool's frozen surface. I made a satellite dish appear as if it had fallen from a tower nearby, causing the hole in the ice and as an eye catching prop to signal 'come this way".
The 'Dud Structure' is used to draw the player in to investigate, and subsequently position them to see the Ice Hole. The idea is the player will deduce they can get behind the Frozen Waterfall by swimming beneath the ice surface.
image of cave v1 before fixes applied + v2 after fixes
Play Tester Feedback
Problem - the first play tester didn't register the man-made structure behind the waterfall leading to confusion after they swam underwater and missed the cave entrance, they assumed the Ice Hole was a 'bonus area', they eventually made progress but it didn't play out how I intended.
Thinking - I wanted the cave walkway to be a fairly easily spotted 'objective' and the hole in the ice to be the 'ahhh I get it' moment, but in my first build I'd made the 'objective' too obscure, so player's resorted to exploring by process of elimination, which wasn't what I was after.
Solution - I added an eye catching blinking light to the cave walkway, brought the walkway closer to the player's viewpoint into the cave, adjusted the Frozen Icicle assets so the view was clearer, and used a subtle spotlight to further illuminate the cave interior and create specular highlights on the water surface. Subsequent play testers easily noticed the walkway in the cave, and connected the dots with the hole in the ice surface.
image underwater before fixes
Play Tester Feedback
Problem - Underwater route too dark, players becoming disoriented too easily.
Solution - I swapped out the water volume for a less opaque type, placed subtly lit rocks on the pool floor to breadcrumb a path for the player, and created light rays coming in through cracks in the ice surface as landmarks to orientate against.


gif of player surfacing inside the cave, reaching the walkway to conclude this section.
Level Area 3
GENERATOR AREA
A secret room, the fire starts, and enemies arrive.
Area Context
The player has made it into the dark underbelly of the facility ruins after an icy swim. Now they just need to find a way forward without attracting any unwanted attention...
Playthrough Footage
Area Design Intent
I wanted this area to be a pacing turning point, where the player openly engages enemies in gun combat for the first time. At first I was planning on a straight up ambush by the enemy but I opted to create a puzzle which results in plausibly drawing the enemies into the area to investigate resulting in a confrontation.
Originally I had planned another area (Fuel Store) to be the origin of the ‘Spreading Fire’ that engulfs the level, however I changed this area to ground zero as this is where the player is discovered, starting the fire here alongside the combat amplifies the dramatic shift in pacing from stealth to action I was after.
2D Layouts
There are 2 map versions because this area went through a more substantial redesign; after play tester feedback and on further reflection I wasn’t happy with how the 'gain entry to the secret room' event plays out, it didn’t fit into the level’s broader narrative context. I talk about this slightly further down in Play Tester Feedback.
Play Sequence:
-
The player has made it inside the facility The environment is dark and obfuscated, the player explores cautiously, there might be enemies.
-
A locked gate requires a key (short term objective).
-
Exploration reveals a secret room where a Key is visible.
-
Gaining entry to the secret room leads to a fire breaking out, alarms sound and enemies arrive to investigate.
-
Player offered a shotgun before the combat encounter, they fight their way back to the locked gate to progress.
This area can be broken into 2 Phases of play:
Phase 1 - Free to explore, no threats, 'Key Door A' discovered, find your way into the Generator Room to get the door key.
World Event - Fire starts, alarms triggered.
Phase 2 - Fight through enemies back towards 'Key Door A'.
Broad Area Development
Aerial and cross section views to help you understand this area's general layout.
UE4 Blockmesh


FC5 Playable Build V1


From Blockmesh to Playable Build V1 the area stayed much the same, the most notable difference is that I made the rooms and passages more condensed in the Playable Build V1, my thinking was to make the area feel claustrophobic and limit the player's view of their surroundings, keeping them on edge incase enemies jump out, and making the area more maze-like by restricting the player's sightlines.
FC5 Playable Build V2


After play tester feedback I reversed this decision and made some of the spaces bigger in Playable Build V2 as improving player navigation took priority, a world event required more space to visually communicate, and I felt the combat phase would benefit from a more open space, improving engagement sightlines and flow.
Water Tank Room Entry


FC5 Playable Build V1
FC5 Playable Build V2
The player passes through ‘Water Tank Room’ soon after they enter the Generator Area, where they will come across Key Door A (Exit Gate). I used a light source to cast lighting through the doorway and across the floor to draw the player’s attention. The idea is to quickly set up the area’s short term objective ‘search for a key’, and to make this door stand apart from all the others.
Key Door A


FC5 Playable Build V2
Play Tester Feedback
Playable V1 - Area Navigation
images v1 stairwells
Problem: Some players were getting confused by Stair Well A, and Stair Well B, at one point a player kept going up Stair Well B, seeing Stair Well A and dismissing it as Stair Well B, to then go back down Stair Well B, and this repeated.
Solution: This was likely because the Stair Wells were identical, I thought their surrounding were distinctive enough but I was wrong. I improved the situation by; adding an obstacle to Stair Well A which must be jumped over (activity landmark) and placed objects to partially hide Stair Well B’s entrance from view in the Water Tanks Room, so the player is less likely to be drawn to it. Stair Well B’s main purpose is for the player to re-enter the Water Tanks Room during the combat phase.


FC5 Playable Build V2 - Stair Well A
FC5 Playable Build V2 - Stair Well B Entrance
The Generator Room - Playable V1


I designed the area with an apparently inaccessible Generator Room in the center, the rest of the playable spaces wrap around it. While the player explores they will repeatedly reach dead-ends with teaser views into the Generator Room, building curiosity, while also clearly showing a Key to tantalise the player. All these teaser view's sightlines don't show the entry solution, which is a large fuel tank, only visible through a grate in the floor of the Water Tank Room.


FC5 Playable Build V1
Blockmesh
Design V1 - Generator Room Entry Sequence
-
Find the sightline to shoot the fuel tank through the floor grate to blow open a damaged wall.
-
Smoke effects used as breadcrumbs to attract player down Stair Well A toward Entry Hallway.
-
Return to the Entry Hallway, a wall has been blasted open creating an entrance into the Generator Room
-
Jump over the fiery fuel tank remains and into the Generator Room below.
Play Tester Feedback
Playable V1 - Generator Room Entry
Success: Registered the Generator Room and curiosity built up as they explored, they saw the key and understood gaining entry was their current progress objective.
Problems: Shooting the fuel tank wasn’t arrived at through reason, there was no ‘ahh I get it, shooting that will create an entrance’, it was more a last resort action. After the fuel tank explodes, players weren’t noticing the fuel tank had opened an entrance, the obscure sightline into the Generator Room made it awkward to see the new opening, and the fire alarms going off distracted the player putting them on guard.
Solutions: I was thinking I’d move the ‘shoot the fuel tank’ sightline from the Water Tank Room’s Floor Grate to a new adjacent position that would clearly show the newly blasted entrance as it happens but I started to question the overall design; ‘Does blowing up a fuel tank make sense when the player is trying to quietly sneak into an enemy infested area?’
Not really... I was so preoccupied with whether or not I could, I didn’t stop to think if I should. The play testers who regularly game didn’t bring up this logical blemish as an issue but interestingly a non-gamer did. They told me they'd hesitated to shoot the fuel tanks because they were trying to be quiet and only blew it up once they couldn't find another way in. I decided to start exploring alternate ideas.
The Generator Area - Playable V2
I decided to use a simple hidden way into the Generator Room and have the fire start due to an unintended consequence of using the hidden entrance.


FC5 Playable Build V2 - Generator Room Teaser Views and Entry Clues


FC5 Playable Build V2 - Generator Room Entry
It goes like this:
-
The player enters the Generator Area, their given ample views into the secret room, and the secret hole entrance is hinted at using lights shining down from above and a flurry of pipes to draw and lead their eye.
-
Player explores, discovers the secret hole hidden behind the large water tanks in the main room, cool.
-
They drop down, land on a dodgy water pipe, crack, not cool.
-
Water gushes out all over a control console, sparks fizz up through the control panel and smoke snakes its way into the air.
-
Moments later, alarms sound and the darkness is punctuated by pulsing waves of bright red light. Thankfully the light illuminating the table with the key and shotgun runs off a different power grid.
Playable V2 - Room Sizes Increased
I made the Water Tanks Room, and Generator Room larger in Design V2, this was because I wanted to make the Generator a bigger landmark, and needed more space to clearly setup and communicate the Water Pipe breaking. The bigger room made it possible to clearly frame the Generator, Pipe Break, and the water pouring over the control panel, all within the player's pov at the room entry point.

This entailed rebuilding the entire area as everything was so tightly packed together in Playable V1 that it would have been like solving a Rubiks cube to modify. The blank canvas approach also helped me take on a fresh mindset and address other smaller issues I'd noted in the first build.
Lesson Learnt: In early drafts build things way bigger than you think they need to be, it's far easier to shrink a bunch of connected spaces than it is to enlarge them.
Got the Key!

While collecting the Key I give the player the opportunity to pickup a shotgun, slugs, grenades, and an armoured vest. I offer them the shotgun here because it gives them an advantage in the subsequent combat and the shotgun is also loud and chaotic which plays into the sudden shift in pacing I was after.
screenshot of key table, and locked exit gate.
The Generator Room has a locked exit gate which ensures the player collects the Key before leaving. The player progresses up Stair Well B where they arrive back in the Water Tank Room and enter into the combat phase.
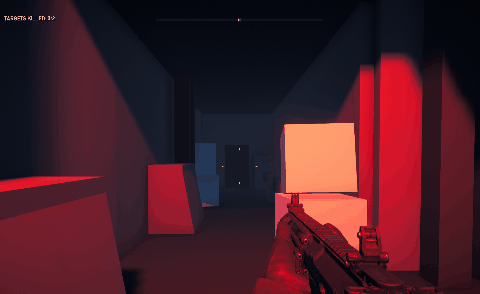
Combat Phase

FC5 Playable Build V2 - Water Tank Room - Combat Phase
Blaring alarms sound and red flashing lights swamp the darkness, upping the tension, and making the enemy combat encounter feel frenzied, while technically posing little threat.
Lesson Learnt: Creating tense combat doesn’t have to equate to using tougher, faster enemies, simply disrupting the player’s ability to comprehend their environment does the job.
Diagram showing enemy
placement and cover annotated
The combat encounter isn’t supposed to be difficult, it's a warm up. There are only 6 basic enemies, no surprise waves, no fancy flanking, sitting ducks really. The player has plenty of cover and a ladder close to where they enter offering them an alternate route with height advantage over the combat encounter. Explosive barrels are placed near where the enemies shoot from, offering a few explosive takedowns.
gif exit through gate A
Level Area 4
UTILITY TUNNELS
Flamer NPC Encounter
Area Context
The player has just been discovered by the enemy as they passed through the Generator Area. A fire broke out and is now spreading throughout the underground tunnels. The player is trying to find a way forward, out of nowhere a dangerous enemy with no fear of fire spearheads an attack against the player.
Area Playthrough
This is the final version of the playable level. The video starts just after the Generator Area (Area 3) and ends at the ladder before entering the Fuel Store (Area 5).
Design Intent
I had been playing the Resident Evil 4 Remake, and there is a moment where you enter a small clearing, turn a corner and a tough enemy blocks the path forward, the player is forced to retreat, only to be surprised by 2 low ranking enemies who have appeared in a previously safe area, surprising and throwing the player off-balance in the suddenly threatening situation.
Resident Evil 4 - Reference Moment
The intent of this area was to do something similar. I decided I to the use the Flamer NPC, I felt they were the most intimidating in a smaller area, fit the 'spreading fire theme', and they’re a decent bullet sponge. I had this image in my head of flames shooting out from around a corner to surprise the player, followed shortly afterwards by the Flamer npc charging out towards the player. If the player retreats they will be surprised again by a low ranking enemy who spawns in further down Tunnel A, creating a crossfire scenario. This became one of my favourite moments in the level.
FC5 Flamer NPC Encounter
2D Layout
The player enters the area by dropping down from a walkway, which locks them into the Flamer Encounter space. The Flamer launches its attack in a narrow hallway, forcing the player to retreat back along a tunnel and into a room which has explosives the player can strategically use against the flamer npc.
Blockmesh


Blockmesh
I deviated from the 2D Layout, changing the retreat space (Store Room) so it now offered a longer sightline down Tunnel A, this is so the player can attack the enemy flamer with some distance between them, and could create an exciting moment where the flamer npc closes the distance while shrugging off the player's attacks.
Playable V1
I made the overall area more confined in Playable V1, this was an attempt to make the Flamer combat encounter more intense by restricting player movement, and forcing a closer combat exchange.
Area Entry


The entrance into the Utility Tunnels immediately teases the way forward, a highlighted ladder can be seen in another room through a locked gate. Green lighting had become the ‘way forward’ signal by this point. It’s not the most subtle guidance but it fulfilled it’s purpose in this project.
The entry is supposed to present like a dead end, but by having a look around the player will discover they’re on a walkway and there’s a tunnel beneath them. I really liked this little ‘bait and switch’ micro puzzling moment. The drop down from the walkway functions as a 1 way gate which locks the player into the area below where they will encounter the Flamer npc.
No Way Back
Shortly after the player drops down from the walkway the fire from the generator area spreads onto the bridge. This was done to communicate the fire is spreading from the Generator Area and that there is no way back.
Playtester Feedback
Playable V1
All playtesters made it through here alive, just about. I felt the flamer encounter was too chaotic and disorientating while watching players tackle it, they mostly seemed to survive by sheer luck, so I adjusted the area to give the player a better sense of control, and shifted the odds against the enemies.
Problem - Player’s were retreating like I intended, but quite often player’s (including myself..) were getting set alight by the flamer in the first few moments of combat, which requires the player to ‘put the flames out’ before they can defend themselves again, this was good to put the player on their backfoot and spike excitement, but the surprise retreat space enemies now posed a real threat to the now low on health and defenseless players.


Solution - I made the hallway retreat space longer, added stronger cover options like the doorway recess where the player can take refuge for a moment to recoup, I reduced the retreat route blocking enemies to a single unit, added an explosive choke point to use against the flamer npc, added more health pickups, and adjusted the retreat space to have better cover placement so the player can more easily control combat engagement with the flamer npc if it makes down Tunnel A. The end result bared a closer resemblance to the original Blockmesh concept.


From the retreat room, the player has a clean sightline to attack the flamer as they close in. Just before the flamer reaches the retreat room there’s an opportunity to use an explosive barrel to take them out.
Cover Design
I did some research into cover design while revising this area. I assumed I could get by off intuition, but I felt my cover placement decisions were a bit shallow. I watched a video that gave me some simple principles to work with, and I've used the retreat room to highlight how I applied some of the ideas learnt.


In Playable V1's space I had inadvertently created 'movement traps' (red boxes). Players can accidently strafe or back into these during combat, and it disrupts flow, possibly resulting in a frustrating death, especially in a tight space like this.
In Playable V2 I simplified the outer edges to avoid trapping the player and created a 2nd central cover choice, this increases movement lanes (blue arrows) for the player to out maneuver the enemy. Using lower cover (orange boxes) I created a sightline opportunity (yellow dashed line) which helps the player keep track of and engage the enemy from a safer distance.
Flamer Entry Scene


Problem: A playtester who's not a big fan of scary games decided to try and sprint through this area, totally catching me off guard. They ran in, the flame effect shocked them, they tensed up and flight mode kicked in, they kept running while aiming at the floor as if that makes them invulnerable, turned right, dead end, fire enveloped them from behind, they span on the spot spraying their machine gun, their sight lands on the flamer npc and click, their clip had emptied, now catching fire they frantically wiggled their analogue sticks as if entering a PS2 cheatcode, some trillionth of decimal place from death they managed to jump and slide their way to safety.
Improvement: I added a prop to catch players attention and hopefully cause them to pause, slowing players down and signaling 'approach with caution'. At first I tried to think of a solution to stop the latter scenario happening again, but in the end I realised it really wasn't a problem, in fact the playtester got a buzz out of it.
Machine Room
cover design improvements pv1 > pv2
Future Pickup Teaser

This is the ‘ Collapsed Stairwell' which is part of the Control Centre Ruins (Area 8). This was added later when the Control Centre Ruins was redesigned to include a Grappling Hook traversal section.
This room is a teaser view of the bottom of a stairwell were the Grappling Hook Pickup is located. I set up a small scene implying one of the enemy troops had plummeted to their death, this unique scene is more likely to stick in the player's mind so they will recall it later when they require the Grappling Hook, and when they finally enter the area they'll know where they are and get the satisfaction of tying up the mystery behind the odd scene. This area was built directly in the FC5 editor later in the project as I felt more comfortable with the editor's quirks by then.
You reached the ladder and climb to safety...
Level Area 5
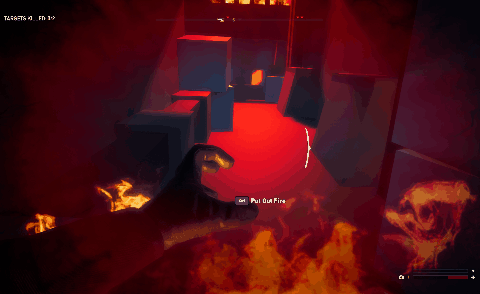
Fuel Store
Explosive Puzzle
Area Context
After surviving the encounter with the Flamethrower NPC, the player progresses up a ladder and enters an area filled with fuel barrels and gas cannisters. The fire from the previous area has spread up the ladder behind them, the player must find a way out before it's too late.
Area Playthrough
This is the final version of the playable level. The video starts just after the Utility Tunnels (Area 4) and ends at the damaged wall, where the players arrives outside at the base of Fire Fight Tower (Area 6).
Design Intent
A puzzle involving the player triggering a domino effect barrel explosion to blast a way through a wall, the solution being they have to find a safe place to trigger the explosion while in a confined space to avoid being blown up too. The idea for this area came out of experimenting with explosives in my FC5 Gym map.
Playthrough Summary
You climb a ladder and enter a confined space filled with explosive objects. Ahead of where you enter you see a cracked wall letting bright light in, explosive barrels placed next to the wall suggest this wall can be brought down, but an explosion here will take you out too. You explore, and discover a safe place to trigger the explosive cascade.
The explosion litters the route back with fire and debris creating an obstacle course, you make your way carefully back to the now destroyed wall and
Design & Development


Fire Fight Tower
Blank Sub Title
Helipad
Blank Sub Title
Control Centre Ruins
Blank Sub Title
Escape Route
Blank Sub Title

High Level Process
Preproduction
Concepting, Testing, Planning
Starting Point
I designed the level around the Far Cry 5 Bounty Hunt gamemode which entails eliminating an NPC target, and then optionally escaping to an extraction zone. I envisioned the level to be a unique set-piece location only accessible during a pivotal main mission set within the Far Cry 5 world.
I decided early on to base the setting around some sort of ruinous derelict building, I assumed I'd be working on this project for quite some time so I chose something I really enjoy visiting in real life.
I began to imagine a level that has the player stealthily breaking into an enemy stronghold, at some point being detected, maybe an ambush, and then they have to fight their way through enemies before the Bounty Target can escape, only for the tables to be turned on the player at the last moment in a surprise boss fight scenario forming the level's climactic beat.


My Sketchbook work
Gathering Ideas
As I come up with ideas I create rough sketches, diagrams, and written notes that capture concepts and how they might work. I like starting with writing as there’s more interpretive space for my imagination to play with, then I'll flesh out a written concept with sketches. To help with creativity I'll research games and movies, collect reference imagery, take photos, and bounce ideas off friends.
First Idea - The Canyon
My very first idea involved a fortress complex built inside and along a canyon, bunkers and towers built into the sides of the cliff walls, with bridges connecting either side, some broken requiring risky platforming segments, the overall setting creating a naturally linear map with plenty of ranged combat opportunities and traversal challenges. I imagined the Bounty Target would be dug in at a well defended bunker at the deepest end of the canyon, and the level would progress from large to smaller spaces as a core theme and pacing technique.

Example Reference Collection

Example Reference Collection
Idea Shift - Alpine Comms Station
I shifted to a high alpine environment with a ruinous Communication Station nestled amongst its peaks, somewhat influenced by watching a few James Bond movies around this time, and because of the assets available to build rocky environments in FC5. The snow themed variety were my favourite looking and had a good variety of shapes to work with. I'd have used theme agnostic rock assets but FC5 doesn't have suitable substitutes. 'Freezing' the level in my mind led directly to the idea for the Frozen Pool area which I go into more detail about in the 'In-Depth Design' section.
Bounty Target Encounter
I had a scene in mind where the player reaches the top of a crumbling tower or peak and encounters the Bounty Target who is cornered, during the fight an attack helicopter swoops out of nowhere to mix things up. I really liked this idea to make the final showdown stand out, and throw the player off balance, so I fixed it for the level’s climactic beat.
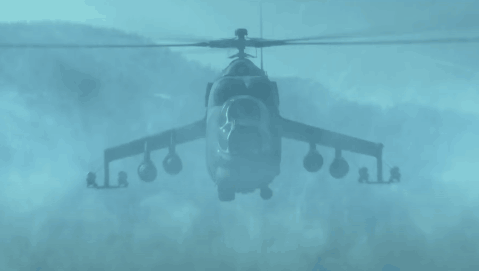
Reference Scene from Top Gun: Maverick
Event Timelines & Narrative Script
As my idea collection built up I started to think about how they might fit together, support a core theme, imply a narrative, and in what sequence their pacing qualities might compliment or contrast each other. I started to formalise my ideas by creating written Event Timelines.
I also established a basic narrative to help contextualise the player’s objectives, and created a script to read out to play testers at specific level checkpoints to mimic what would be in-game mission updates.
Event Timelines
Narrative Scripts
The 'Event Timelines' PDF contains the 'Canyon Fortress' idea and the 'Comms Station' which this project is based on.
Timeline Graphic
This infographic summarises my level early in development. Scroll to the right in the PDF viewer to see the rest of it.
Fire Spreading Theme
While working on the Event Timeline and thinking about how areas might interrelate a connection between a puzzle obstacle area (Fuel Store) and a subsequent combat area (Fire Fight Tower) formed.
The Fuel Store solution results in a fire breaking out, initially this was going to be isolated to the immediate area, however my imagination ran with it and I thought it would be cool if the fire spreads up into the next area, adding an exciting element to the tower's combat sequence.
The idea of fire spreading through the ruin and chasing the player became a core theme leading up to the climactic Bounty Target NPC encounter. Later in development the fire's origin was changed to an earlier area (Generator Area) as it fit better with a major turning point in the level's pacing. I go into detail about the design of the areas in the 'In-Depth Design' sections.

Fuel Store and Fire Fight Tower
fire spreading concept.
Far Cry 5 Gym
I built a gym map to refamiliarise myself with the editor and as a space to experiment and test my ideas.


Main takeaways from the Gym:
-
Learnt how to get the enemy npc's to use vehicles - the ai must chose to use the vehicle, there isn't an 'assign to vehicle' parameter.
-
Tested helicopter combat - Learnt to use the LMG or Flamer unit as the pilot because they can take more damage, other npcs are too easy to kill.
-
Decided on a modular structures palette and environment assets.
-
Got a feel for the player character's metrics.
-
Tested out all sorts of weapons, and enemy types in combat.
-
Chose the Bounty Target - a sniper NPC who was particularly tough to kill earned the lead role. He was fired later in development when he was found to be abusing glitch paraphernalia.


I created a diorama to experiment with scripting fire and learning how it interacts with various assets. This lead to ideas about how I might use explosive objects for a puzzle (Fuel Store Area).
Lesson Learnt - Experimenting with the 'Spreading Fire' idea I learnt that there's no way to toggle visual effect visibility in the editor, so I adjusted my build process to use tiny placeholder fire assets to minimise obscuring my view while working.

High Level Process
2D Layouts
Once I had an Event Timeline I was happy with and an idea of how each area of the level might work I started creating digital 2D maps to crystalise my ideas.
I approached this by creating 2 types of map; a zoomed out macro layout for overall area composition, and zoomed in micro layouts describing individual areas in more detail.
Although it’s a linear level I wanted it to feel like a real location, so I had the player’s critical path repeatedly expose them to views of past and future playable areas to feign a sense of openness.
Macro Layout
The buildings and underground sections are placeholder shapes, here I was focused on how the areas might be placed in relation to each other.
Use the PDF zoom +/- controls to check out the maps in detail.
Micro Layouts
Here are all the digital layouts I created for this project in order of play, there are few maps which have multiple versions, this was due to redesigning a few areas later in development.
To learn more about the level areas shown check out the 'In-Depth Design' section of this presentation.
I've provided a symbol key below the map panel to help you understand the layouts.

High Level Process
Blockmesh
An overview of the blockmeshing work done in Unreal Engine 4.
I used Unreal Engine 4 to develop a 3D vision of my 2d maps. Once complete I had a stronger foundation to work from when committing to a Far Cry 5 editor build. FC5's editor lacks a lot of standard features like a scene outliner, orthographic view modes, or the ability to group objects, so UE4 was far quicker for me to get the initial layouts drafted.
Compositional Blockmesh


< Use the arrows at the image sides to arc around the map >
I first blockmeshed the level using giant cube meshes to figure out where I wanted; buildings to go, landmarks, potential vistas, the player’s critical path, and introduce verticality to make the level more interesting to move through.
Streamlining Editor Assets


FC5 Build Kit
Unreal Engine 4 Build Kit
Once I was happy with the compositional blockout, I created the buildings using a modular kit I made in UE4 which replicates some of the modular building assets available in FC5. This meant I could figure out general building layouts quickly in UE4, and then simply replicate the buildings inside the FC5 editor.
Final Blockmesh


< Use the arrows at the image sides to arc around the map >
As the blockmesh developed I continually explored using the First Person Pawn built into Unreal Engine 4, using my imagination to ‘play’ through the environments I visualised; how combat sequences might play out, where cover could go, how the fire could spread through the ruins, and how the ebb and flow of pacing might work.
Development Summary
2D Layout > Final Blockmesh
-
Player's early path repeatedly frames the Radome (big white sphere on top of the Comms Ruins) as landmark guidance as they get closer to the ruins early in the level.
-
Surrounding towers added as potential sniper nests.
-
Idea to move the Bounty Target NPC to a tower overlooking the Control Centre Ruins, and having the tower be obliterated in an explosion which eliminates the target.
-
HMG trucks arrive in the forest as player travels through the gatehouse during their escape.
-
Forested escape area becomes a 'feel powerful' moment for the player who will have just gained a few powerful weapons and has a dominating vantage point from the Gatehouse Roof.
Final Blockmesh Walkthrough
This gallery is fully commented to show the entire level's intended playthrough.


High Level Process
FC5 PLAYABLE
A high level overview of the stages the FC5 Playable Build went through, including Playtester Sessions.
Playable V1


< Use the arrows at the image sides to arc around the map >
Note: the world lighting was altered for the screenshots, the level takes place during the night.
Development Summary
Blockmesh > Playable V1
-
The 'Escape Route' design was changed before reaching a playable state, dropping the Gatehouse for a larger woodland combat arena where enemies arrive in trucks at the last minute surprising the player and blocking the exit gate.
-
The Control Centre Ruins were extended and modified so the player ends up on an exposed rooftop area, this was done to improve the attack helicopter encounter as there were issues with the original partially enclosed arena design.
-
The Bounty Target NPC was changed from a sniper unit to a pair of tough assault units. Now when the tower is destroyed it triggers the Bounty Targets to zipline down to fight the player on the rooftop arena.
I talk more about these developments in the 'In-Depth Design' sections.
Playable V2


< Use the arrows at the image sides to arc around the map >
Note: the world lighting was altered for the screenshots, the level takes place during the night.
Changes Summary between Playable V1 > V2
I talk more about these developments in the 'In-Depth Design' sections.
Play Tester Sessions
I had 2 play testers run Playable V1, with each tester session I tweaked the design. After these sessions I made some significant changes to the level, had another tester run the redesigned underground level areas, and eventually I arrived at Playable V2. I dropped the dev material colours in V2 and added some more visual details, lighting, fog, and more particle effects.
I had Playable V2 tested by fresh eyes and made a few more revisions. Finally I had the "gold release" played by my 4th victim. The final test was mainly to see whether my revisions had addressed the issues found in prior testing sessions.
Playable V2 feedback revealed it's fare share of issues but I'd decided early on this was the conclusion of the project. After almost 5 months I wanted to take on something new, and by now I was pretty happy with what I'd gotten out of the project as a learning experience.
I've provided a PDF of notes from the play tester sessions and an internal testing session.
Testing Notes
FC5 Technical Challenges
World Lighting

World Daytime Lighting
+ Lighting Management

World Nighttime Lighting
+ Lighting Management
Originally the level was going to take place during the day, but while preparing Playable V1 for play tester sessions I encountered an issue with how the lighting in FC5 editor works where indoor areas were still receiving global ambient lighting and appearing too bright.
I tried to use Lighting Management Volumes to make the indoor areas darker but the effect wasn't strong enough, so I changed the entire level to night time, which in retrospect made more narrative sense as the player's character would likely use the cover of darkness to covertly enter the station.
Project Conclusion
Blank Sub Title
Testimonials

Gretchen Freeman
"Ads made sure I had some nice cover to hide behind."

Buck Whittaker
"I felt right at home
with my big gun."

Hoyt Augustine
"Give this man a job immediately!"